From a beginner perspective, I found this tutorial is quite useful, but could be better. Thus I came out with this setup guide to patch the missing part of the link above. Without more words, let get started:
Part (A) VPC setup
(This part I won't elaborate more, here are steps exerpt from link above):
1) To create a new Virtual PC (VPC) machine, click the New button in the Virtual PC console.
2) A New Virtual Machine Wizard opens (Figure 2). This wizard will guide you through the steps to configure your virtual machine.
3) Because we are creating a new operating system from scratch, choose the Create a virtual machine button.
4) In the Name and location field, enter the path and file name for your project. The file will be saved with the .vmc extension.
4) In the Name and location field, enter the path and file name for your project. The file will be saved with the .vmc extension.
5) In the Operating System field, choose Windows XP as the operating system for the VPC machine. Windows XP Embedded and Windows XP Professional use the same binary files.
6) Select the RAM amount for the virtual machine. The default amount (128 MB) is sufficient; however, you can adjust the amount.
7) Choose the A new virtual hard disk button to create a new virtual hard disk that will store the operating system image.
8) In the Name and location field, type the name and path for the file that will contain your Virtual PC machine's hard disk. This file will be approximately 300 MB in size.
9) (From this part onwards is for partitioning the disk) Type the following command from a command prompt:
- DISKPART
10) Type the following commands to create the partition:
- SELECT DISK 0
- CLEAN
- CREATE PARTITION PRIMARY
11) Type the following command to verify the partition:
- LIST PARTITION
12) Type the following commands to verify that the partition is active:
- SELECT PARTITION 1
- ACTIVE
13) Type EXIT to quit DISKPART.
14) Type EXIT again to reboot Windows PE.
Part (B) Capturing the Hardware Information:
1) From VPC console, start the vpc setup from part (A). Insert Disc 1 into CD-Rom and capture it through VPC menu: CD>Use physical drive .
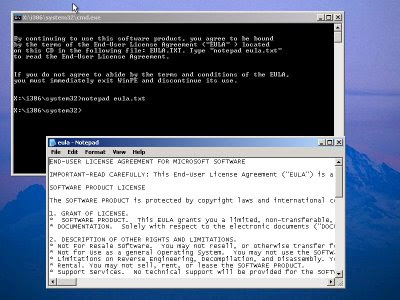
2) Once it captures the installer, the installation starts.
3) Read the EULA.txt for legal acknowledgement.
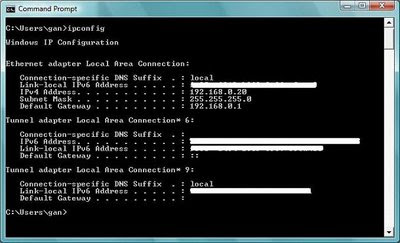
4) Back to your host machine, open command prompt and type "IPCONFIG" to get your local IP address.
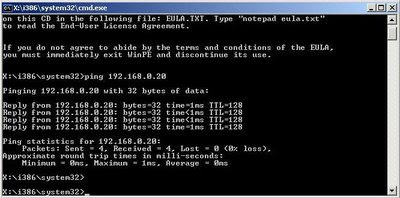
5) Back to the VPC and try to ping from it, you might need to turn off the Firewall.
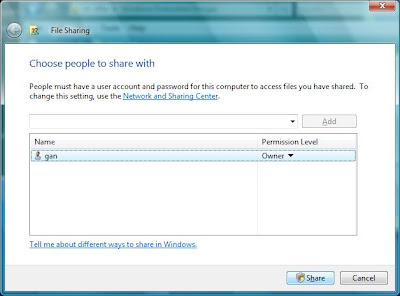
6) Back to host machine again, and right-click the CD-Rom and select "Share".
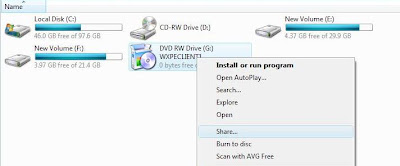
7) Click "Advanced Sharing"
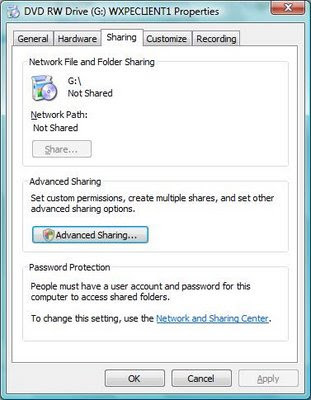 8) Check the "Share this folder". Click "OK" to exit.
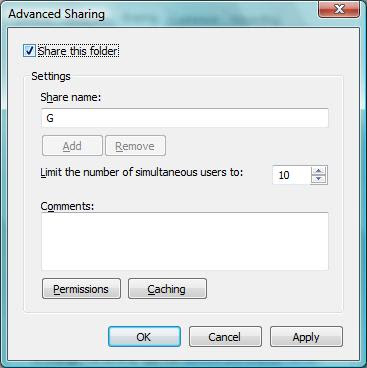
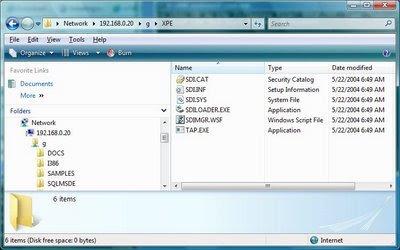
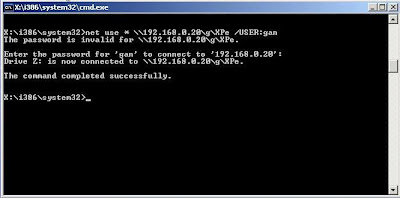
9) You can confirm again by typing the UNC address, to verify the CD installer can be accessed from network sharing.
10) You also need a admin account with password. Go to "Control Panel">"User Accounts" to create password, if you did not set it previously.

11) Create a folder at host machine, let's say: C:\VPC\XPe\XPeImages (try to use a folder without space between it, you can reduce your trouble later), and right-click, select "Share":

11) Select the appropriate user.
11) Now, use the "net use" command for the subsequent command to access it. (From TechNet) The function of "net use" is : Connects a computer to or disconnects a computer from a shared resource, or displays information about computer connections. The command also controls persistent net connections. Used without parameters, net use retrieves a list of network connections.
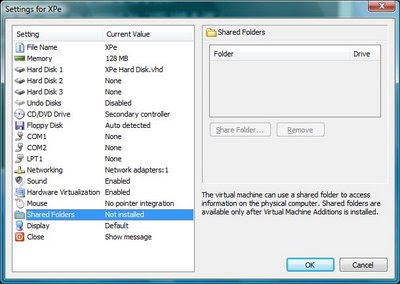
12) "Shared Folders" cannot be used since Virtual Machine Additions have not installed yet.
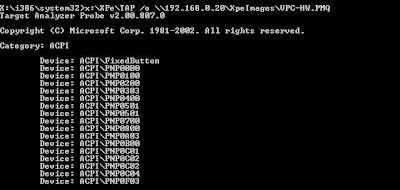
12) Execute the "TAP command to generate the hardware component information to the shared folder mentioned in step (11). This file is an XML files with all the virtual hardware information for this VPC. We are going to use this file in the part (C) for building Windows XPe image file.
 13) You are done for this part (B).
 Will continue part (C) to a new post ...
No comments:
Post a Comment