I involved in a website, where one of the requirement is to create Folder-like html nested lists. There's some trick to do it, some have introduced at:
1) using image (simple)

2) CSS background property (a bit imagination requires)

So far no issue, but to apply them on HTML with bootstrap, it really takes a bit extra of time, especially for those people that are not good in CSS, like me. I was looking fast-and-clean approach, something like CSS Icon Fonts, but built-in Glyphicons & Font Awesome does not come with it, Goggling other existing icon font also yields no result.
Then I bumped into this website, fontastic, prompting the idea of creating my Icon Font. From here, I found out that it needs .svg file to create icon font. SVG defines graphics in XML format. Now you know why Icon Font can be sized, since it's vector image. Thus I pick-up the tool, svg-edit, I used before in this post, and start creating the asset. Let's begin.
1) Download the "svg-edit", extract the zip file and click "svg-editor.html" to load the editor.
2) You'll be welcomed with default blank canvas. Click on the "Rectangle".

3) Try to create something like this. As you can see, I create the vertical rectangle over the size of the canvas. If i create with exact fit, it'd be far too small when Icon Font generated later, could be padding or margin issue. Try it yourself. And I found out that the color does not matter now.


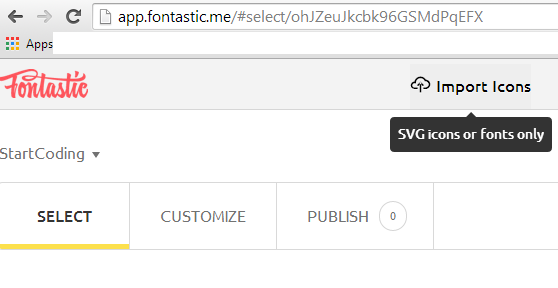
5) Now the asset is done. Let's go to create the Icon Font at fontastic.
6) Select "Modify Font" if it default to it, else create new font.

7) Give a descriptive name, this will be the name use in html.

8) Now we import the "m.svg" created early.
9) Import successful!
10) Preview of our Icon Font. It still looks weird, huh? Bear for while, click "Change set name".


12) Click this set to add to your font, and you can see you have "1" ready to publish.


14) Now you can prepare to add it to your HTML. Let's use one of the very nice bootstrap menu library, metisMenu.
15) Download it's js library and sample. Add these few lines into the sample html provided by metisMenu.
This CSS is for adding extra second-level indentation.
Add this HTML to all the nested list "li" , and it is for adding the Icon Font generated.
16) Yeah, a nice folder-like html nested lists you got by now! You can download the source here.

p/s: When you use this Icon Font in Google Chrome browser, you might experience some weird issue. I think Google Chrome use some scaling technique to adjust the web content, so when you enlarge the browser to a special size like "110%", it skewed.

So, you have to apply the fix, for more please follow this link.
@media screen and (-webkit-min-device-pixel-ratio:0) {
 @font-face {
 font-family: 'startcoding';
 src: url("fonts/startcoding.svg#startcoding") format("svg");
 }
}


