I found the PartitionMagic and it seems able to do the job by merging the partitions, but it is not free. I need a free software to achieve that and I found GParted. Since it's used mainly for *nix environment, I knew it not gonna be user-friendly. There's not executable files for you to run it on Windows. Lucky, the liveCD is designed to solve this problem across the platform.
So, here are the steps to merge the partitions using GParted:
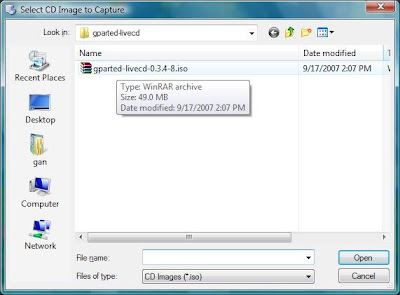
1) Capture the GParted liveCD iso image from the Virtual PC Console.
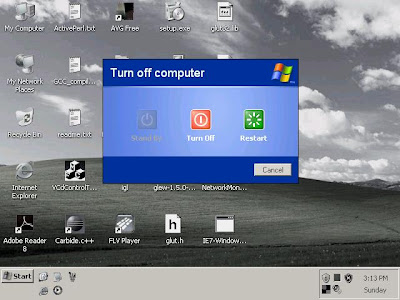
2) Reboot the OS.
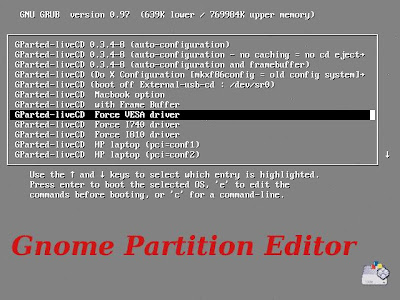
3) After reboot, the Gnome Partition Editor will be loaded. Select the "GParted-liveCD Force VESA Driver" (If you have problem on "GParted-liveCD XXX (auto-configuration)", you better select this one, how do you know? Your screen will totally blank later.)"
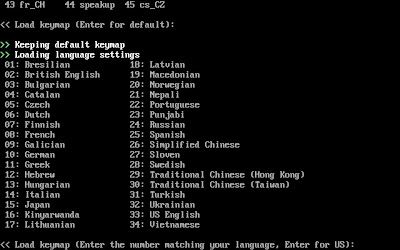
 4) You will be asked to key-in the keymap twice. Hit enter to proceed.
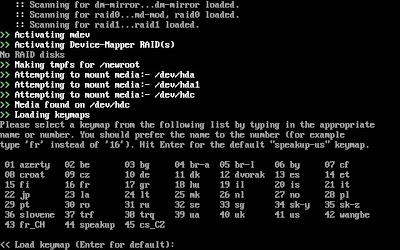
 5) Now the main app will load. Since there is some reading problem on the PS/2 mouse, you would not be able to use the mouse. Quoted from Arcane Code:
"First, let me take a second to explain what the issue is. There was a bug in the kernel code that affected many different distros of Linux. Apparently the kernel was not finding PS/2 style mice. Some work has been done and now most PS/2 style mice are now being found.
Except, sadly for the ones being emulated. Both VMWare and VirtualPC emulate a PS/2 style mouse, and are not getting found by the kernel. Remember, it doesn’t matter what type of mouse you have hooked up to the host box (I have two mice, a Logitech MediaPlay and Microsoft Travel mouse, both USB). It only matters what the virtual machine is telling the guest OS (Ubuntu), which is PS/2 style mouse."
Except, sadly for the ones being emulated. Both VMWare and VirtualPC emulate a PS/2 style mouse, and are not getting found by the kernel. Remember, it doesn’t matter what type of mouse you have hooked up to the host box (I have two mice, a Logitech MediaPlay and Microsoft Travel mouse, both USB). It only matters what the virtual machine is telling the guest OS (Ubuntu), which is PS/2 style mouse."
Now you have to go back to old day practice : using keyboard.
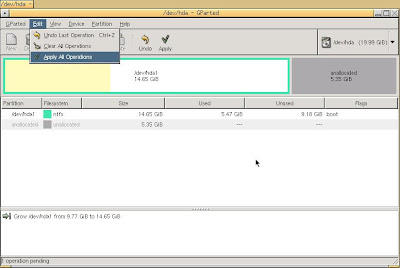
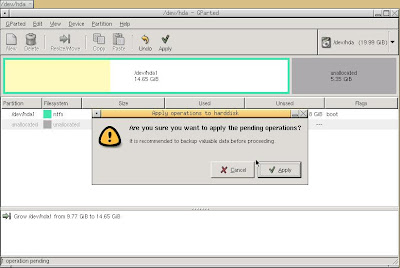
 9) Use "Alt-E" and "Down" arrow key to select the "Apply All Operations". Partition merging will be started.
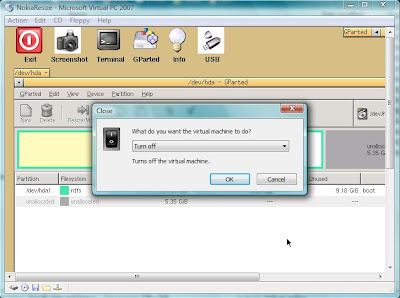
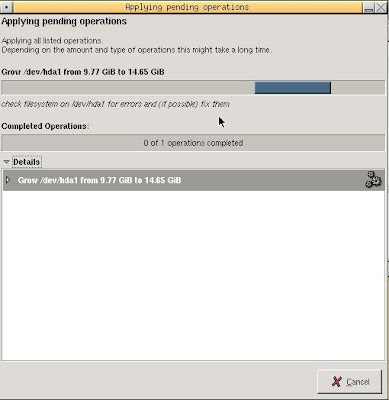 10) Once it's done, turn-off the Virtual PC and reboot.
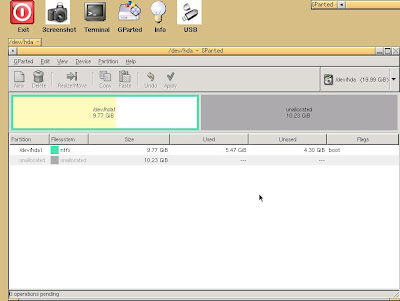
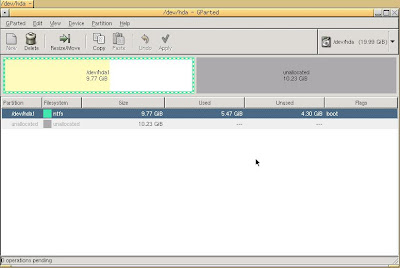
6) Press "Tab" key until the main drive is selected. You will know when the row is highlighted.
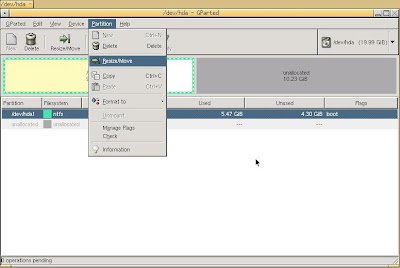
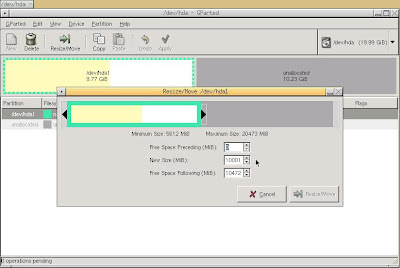
7) Now press "Alt-P" and "Down" arrow key to select the "Resize/Move" menu.
8) Leave the "Free Spacing Preceding" and key-in how much size you want to expand in "New Size" textbox. The "Resize/Move" button will be enabled once you made changes. Use "Tab" to move the focus to "Resize/Move" button and hit "Enter".
9) Use "Alt-E" and "Down" arrow key to select the "Apply All Operations". Partition merging will be started. 10) Once it's done, turn-off the Virtual PC and reboot.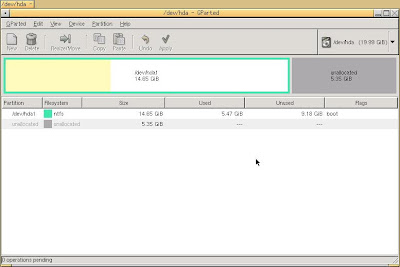
 11) This time, select "Boot partition #1 on the first hard drive". (You need to scroll down if you did not see it from the Gnome Partition Editor.
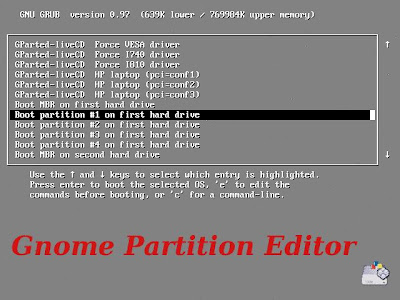
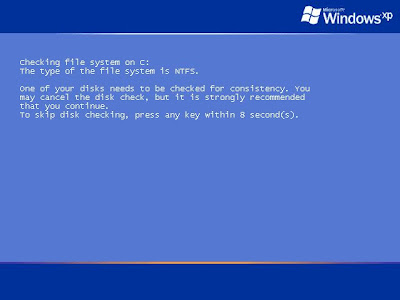
12) Windows will load and check for the disk consistency. Let it do the dirty job and it will reboot twice.
 13) Eventually, the partition merge is done and now you will see the extra hard-disk space increase on the main primary partition. (You might need to release the iso image captured on step 1 after done)
 Here's the link where you can
4 comments:
Sweet,,,,very sweet!
thxs
Thanks. I use GParted Live and GParted all the time. Didn't even cross my mind to use it on a VPC and you are exactly right. Had you not said to force VESC, I wouldn't have been able to do anything.
Again, thanks for the reminder and thanks for the tip on VESC.
you are welcome :)
Post a Comment