Showing posts with label Virtual PC. Show all posts

Wednesday, October 29, 2008

Visual Studio 2010 and .NET Framework 4.0 CTP released

Almost one month after Microsoft unveiled the press release, Visual Studio 2010 and .NET Framework 4.0 CTP can be downloaded from here: Microsoft Pre-release Software Visual Studio 2010 and .NET Framework 4.0 Community Technology Preview(CTP), and it is available in VHD format.

Here're some overview:
  • Democratizing Application Lifecycle Management
  • Enabling emerging trends
  • Inspiring developer delight
  • Riding the next generation platform wave.
Pick it up fast, and you could be the next MVP!
(Following image is external link)

Wednesday, October 22, 2008

10 Developer-must-have apps

While so many bloggers have suggested the usable tools to their audience, how could i lag? Although Scott Hanselman have covered most, and it's a mountain high to climb, let me introduce my favourite top 10 developer-must-have apps:

1) Notepad++ (Language: neutral)
when you need it?
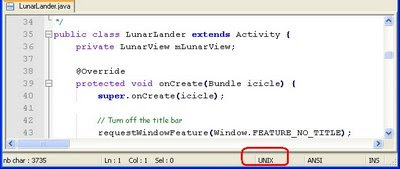
a) View Unix files in Windows platform, especially during Java development.

when you open a come-with-JDK Java file using notepad

when you open it using Notepad++, it's well-formatted

b) Need to probe the _ViewState of ASP .NET web page to see how stateless HTTP retains value after post-back, using base64 decode. (you can try it here)

A normal ASP .NET with its HTML source

Copy the content to Notepad++

Decode it to base64, you can see your state retained

c) Determine Byte-Order-Mark of a file, whether it's saved in following formats: UTF-8, UTF-16, UTF-16 (LE), UTF-32 (BE), UTF-32 (LE), UTF-7, UTF-1, UTF-EBCDIC, SCSU, BOCU-1. And it's exactly .Net method GetPreamble trying to do.
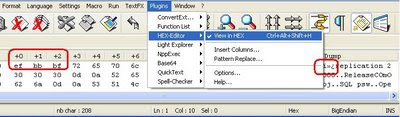
Did you see extra three bytes ahead your file content?

d) it's lightweight, unlike Visual Studio IDE, although Noah Coad might beg to differ.
e) Hey! "All I've mentioned above, other editors have the same features as well". Well, simply I like its UI also.
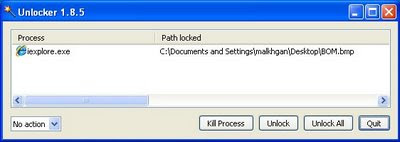
2) Unlocker (Language: neutral)
when you need it?
a) When you want to delete a file which is being viewed/locked by hidden host. That's nothing more annoyed than this.

b) When a file get locked by your app, especially using class File.IO to write it without closing the stream properly.
c) When you try to delete an old ASP .NET version 1.1 web projects in "Inetpub" that's being locked by IIS.

3) Dependency Walker (Language: native)
when you need it?
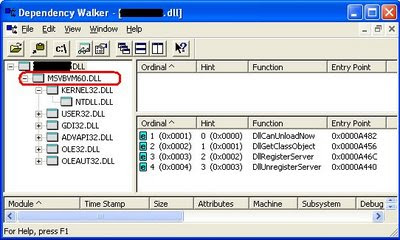
a) When you need to determine a EXE is a native exe or .NET managed exe. Why, because you can decompile the source accordingly later :)

A .NET exe

A VB6 dll

b) Of course, find the exe/dll dependencies, as the name implies. When you were in the pre-NET era with only Visual C++/Visual Basic 6 & Package Deployment Wizard, there's no such thing called MSI technology, which can help you to determine most of the dependencies for you.

4) Process Explorer (Language: neutral)
when you need it?
a) When you need to find out what process/apps/service is running secretly. You'll never know your employer have planted a window service for software inventory control on your laptop, until you run it.

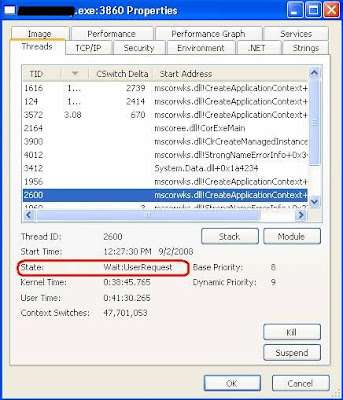
b) Check the thread state of a stopped thread, probably due to Timeout of Three-Way Handshake in FTP uploading/downloading, when you suppose to have a multi-threaded app run without stopping FTP upload/download.

5) Microsoft Network Monitor (Language: neutral)
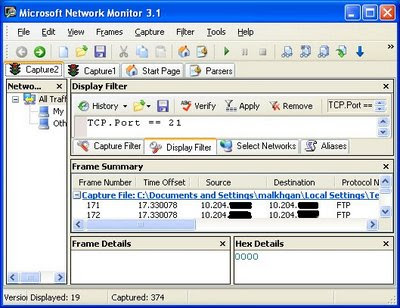
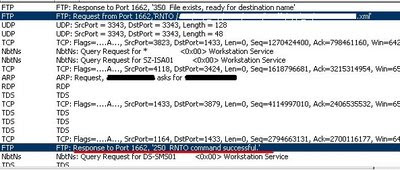
when you need it?
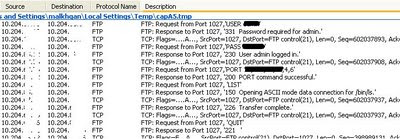
a) When you have written a FTP client app running well on uploading files, but FTP server complaint it never receive. You can show this to prove.


b) When you need to sniff network traffic, especially on FTP since all the commands are transferred thru' Cleartext.

Wow, you can see user-name and password!

6) Reflector (Language: .NET)
when you need it?
a) When you need to re-generate the source that lost and you do not have any source control previously, with the aid from plug-in, FileDisassembler
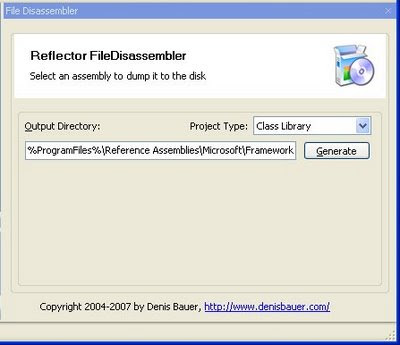

b) When you need to find the difference between the exe/dll you deployed, with the another aid from plug-in, Diff

7) DebugView (Language: native/.NET)
when you need it?
a) When your app only with issue happens intermittently, you need your app to run in verbose mode using Debug.Print without additional tracer running side-by-side, that might affect the performance, or introduce new bug/maintenance issue. This works well for native app too, using Win32.

8) 7Z (Language: neutral)
when you need it?
a) It supports most of the commercial format, yet without asking you to purchase every time it loads, eg. WinZip, Winrar. Furthermore, it able to compress more to save your disk-space.

b) When you need to find out how the zip file is created. Either SharpZipLib or Windows built-in zipping tool; compression method is either DEFLATE, Implode, or Store. You can get the Host OS and CRC as well.

this zip file is compressed using SharpZipLib with DEFLATE method
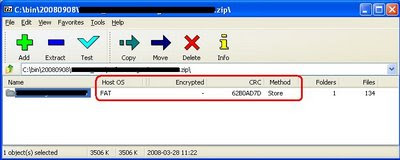
this zip file is compressed using Store method

this zip file is compressed using Windows built-in zipping tool

9) Microsoft Virtual PC (Language: neutral)
when you need it?
a) When you wish to be beta tester yet you do not want to jeopardize your existing system.
b) When you found virus, and you need to cultivate it in order to trace the originator, so that... counter-hack!
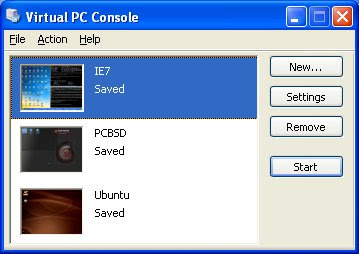
c) When you need to test your web app in different OS. MS has prepared it for you to use it until January, 2009. Flavours available: Windows XP SP3 with IE6 VHD file, Windows XP SP2 with IE7 VHD file, Windows XP SP3 with IE8 Beta 2 VHD file, and Vista Image with IE7 VHD file. (see: Internet Explorer Application Compatibility VPC Image)
d) When you wish to play around with different *-nix OS.

10) Windiff (Language: neutral)
a) Basically for file compare and directory compare. I have used it since development in Visual C++ 6.0. Though it might not user-friendly, eg, cannot compare in separate panes, cannot compare Unicode/UTF-8 files. But it comes with Visual C++ 6.0 and have been with me so long, I feel hard to say goodbye to it.

Monday, June 30, 2008

Getting started with Installation of Windows XP Embedded (2)

From the last post, we now proceed to build the XPe image.

Part (C) Building Windows XP Embedded Image:
1) (Actually you need it since Part (A)) Get the CD installer from: http://www.microsoft.com/windows/embedded/downloads/default.mspx

2) You might need to register to get the product key at MS: http://www.microsoft.com/windows/embedded/eval/getregistration.mspx

3) Insert the Dics 1. Browse to "Tools Setup" in left pane. Click to install.

4) You might need to insert product key, mentioned at step (4).

5) Browse to "Database Engine Setup" and click to install. This will install MSDE.

6) Browse to "Database Setup" this time. Click to install.

7) If you did not follow step (5) & (6), you might get this error message.

8) Once the installation done, launch the Microsoft Component Designer.

9) Import the hardware information xml file we created on Part (B).

10) Go to "Select Prototype Component", expand the Software/Test & Development node and select the Selector Prototype component. From the File menu, choose Save to save your component. A file with extension SLD is created with your component definition

11) From the Tools menu, choose Component Database Manager to open this tool.

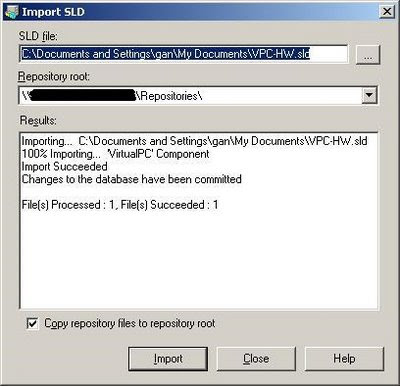
12) Select Import and choose the SLD file that you just create. Make sure it imports successfully.


13) Now we launch the Microsoft Target Designer. Create new configuration.

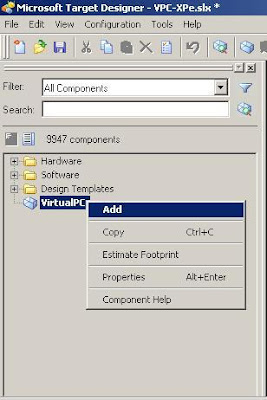
14) From the list of component, right-click on the component we newly create and select "Add".


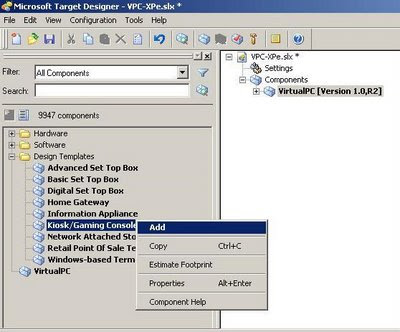
15) Add extra component, We will use the Kiosk/Gaming Console macro component, a design template that can be found under Design Templates.


16) Add the Runtime Quick Start Helper Component that will speed up the process..

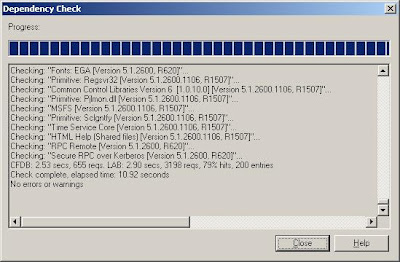
17) To build our image, press F5 to check dependencies. All necessary underlying components are added to the image.


18) Expand the User Interface Core component and select settings. The settings appear in the details pane. Select to Show Run on Start Menu, Show All Programs List on Start Menu, and any other settings you want to apply.


19) We can now build the image. Hit F7. You might be asked for dependencies check.

20) Once the image building success, we got the file we want.

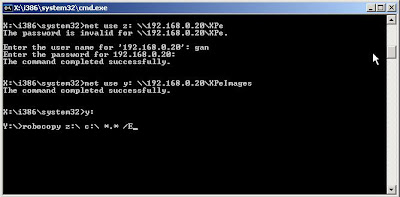
21) We need to copy the image file to the root drive of VPC we created and formatted at Part (A). You can download it from MSDN.

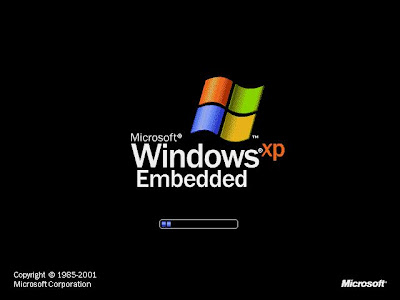
22) We can exit the command prompt in VPC by typing EXIT to reboot. Detach the CD installer. Here we got Windows XP Embeded.


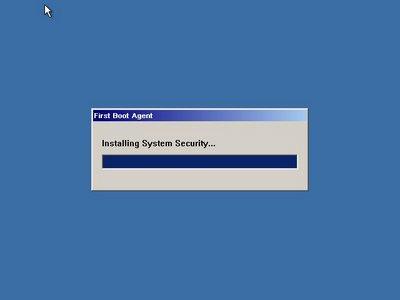
23) The first boot will go through the First Boot Agent (FBA) process, which builds the machine registry, enumerates the device drivers, registers all components, and so on..

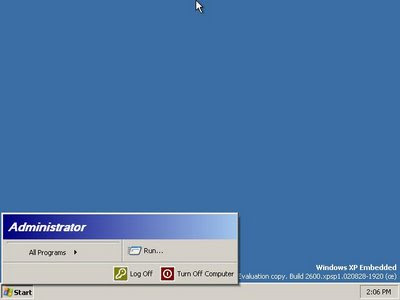
24) Reboot done and we got our desktop.

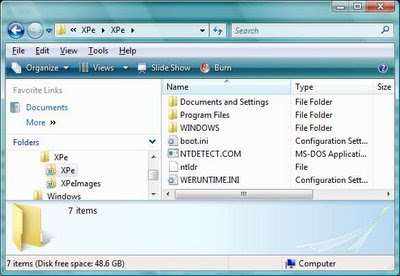
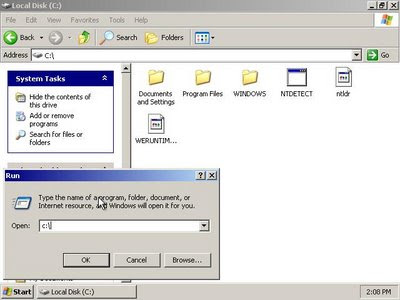
25) We also can browse to root folder. Done.

26) Whew! what a lengthy installation. Luckily, MS have simplify it.

Sunday, June 29, 2008

Getting started with Installation of Windows XP Embedded

Recently I am busy with table partitioning and JBoss/Hibernate projects, thus I could not post any new post. While the project approaching the end of completion, I found there's an article on Windows XP Embedded (XPe) installation setup: How to Demonstrate Windows XP Embedded using Virtual PC . Thus I go to my CD rack and find back my installation CD I get last time (1 year ago), from a seminar organized by local MS.

From a beginner perspective, I found this tutorial is quite useful, but could be better. Thus I came out with this setup guide to patch the missing part of the link above. Without more words, let get started:

Part (A) VPC setup
(This part I won't elaborate more, here are steps exerpt from link above):
1) To create a new Virtual PC (VPC) machine, click the New button in the Virtual PC console.
2) A New Virtual Machine Wizard opens (Figure 2). This wizard will guide you through the steps to configure your virtual machine.
3) Because we are creating a new operating system from scratch, choose the Create a virtual machine button.
4) In the Name and location field, enter the path and file name for your project. The file will be saved with the .vmc extension.
5) In the Operating System field, choose Windows XP as the operating system for the VPC machine. Windows XP Embedded and Windows XP Professional use the same binary files.
6) Select the RAM amount for the virtual machine. The default amount (128 MB) is sufficient; however, you can adjust the amount.
7) Choose the A new virtual hard disk button to create a new virtual hard disk that will store the operating system image.
8) In the Name and location field, type the name and path for the file that will contain your Virtual PC machine's hard disk. This file will be approximately 300 MB in size.
9) (From this part onwards is for partitioning the disk) Type the following command from a command prompt:
  • DISKPART
10) Type the following commands to create the partition:
  • SELECT DISK 0
  • CLEAN
  • CREATE PARTITION PRIMARY
11) Type the following command to verify the partition:
  • LIST PARTITION
12) Type the following commands to verify that the partition is active:
  • SELECT PARTITION 1
  • ACTIVE
13) Type EXIT to quit DISKPART.
14) Type EXIT again to reboot Windows PE.

Part (B) Capturing the Hardware Information:
1) From VPC console, start the vpc setup from part (A). Insert Disc 1 into CD-Rom and capture it through VPC menu: CD>Use physical drive .

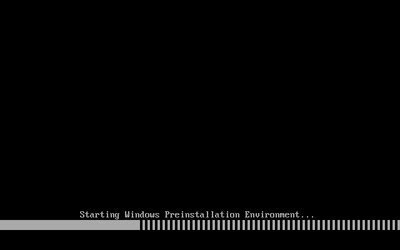
2) Once it captures the installer, the installation starts.


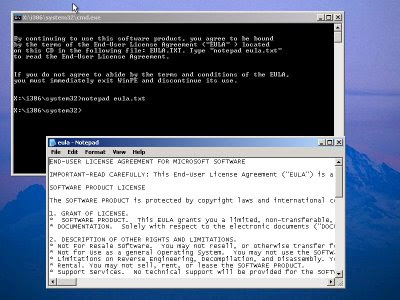
3) Read the EULA.txt for legal acknowledgement.


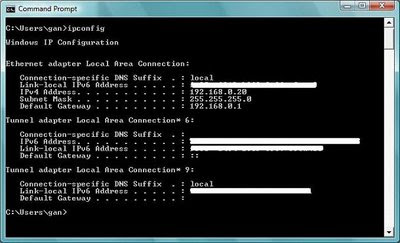
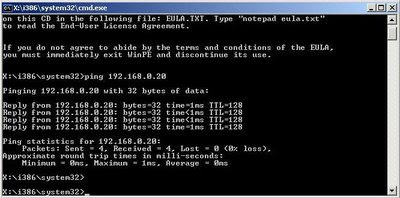
4) Back to your host machine, open command prompt and type "IPCONFIG" to get your local IP address.


5) Back to the VPC and try to ping from it, you might need to turn off the Firewall.


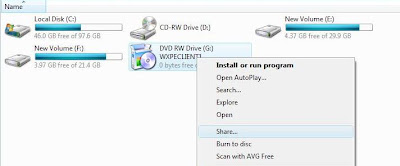
6) Back to host machine again, and right-click the CD-Rom and select "Share".


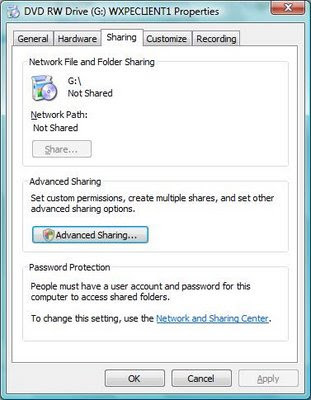
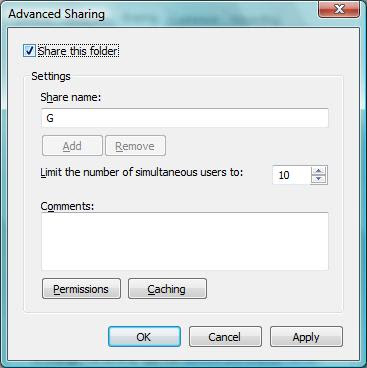
7) Click "Advanced Sharing"

8) Check the "Share this folder". Click "OK" to exit.
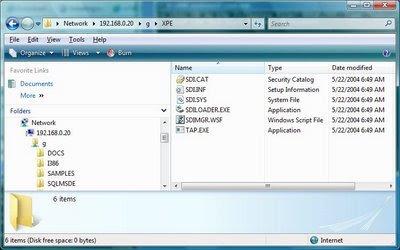

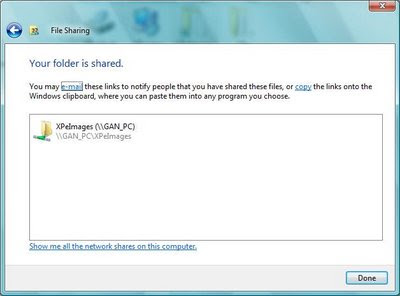
9) You can confirm again by typing the UNC address, to verify the CD installer can be accessed from network sharing.


10) You also need a admin account with password. Go to "Control Panel">"User Accounts" to create password, if you did not set it previously.

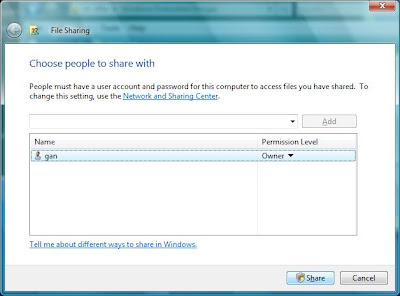
11) Create a folder at host machine, let's say: C:\VPC\XPe\XPeImages (try to use a folder without space between it, you can reduce your trouble later), and right-click, select "Share":


11) Select the appropriate user.


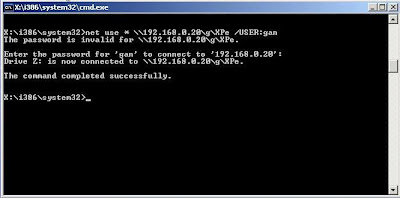
11) Now, use the "net use" command for the subsequent command to access it. (From TechNet) The function of "net use" is : Connects a computer to or disconnects a computer from a shared resource, or displays information about computer connections. The command also controls persistent net connections. Used without parameters, net use retrieves a list of network connections.


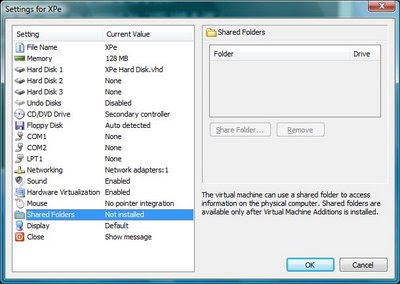
12) "Shared Folders" cannot be used since Virtual Machine Additions have not installed yet.

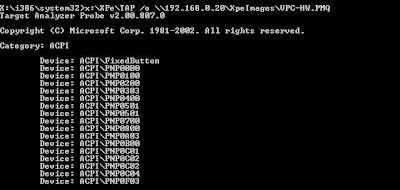
12) Execute the "TAP command to generate the hardware component information to the shared folder mentioned in step (11). This file is an XML files with all the virtual hardware information for this VPC. We are going to use this file in the part (C) for building Windows XPe image file.

13) You are done for this part (B).
Will continue part (C) to a new post ...